[JSP/Servlet] 파일 업로드
먼저 업로드 기능을 사용하기 위해 오픈 소스 라이브러리를 설치한다.
The Jakarta Site - The Apache Jakarta™ Project -- Java Related Products
Founded in 1999, the Jakarta Project housed a diverse set of popular open source Java solutions. In 2005, as a part of creating a flatter Apache Software Foundation, Jakarta subprojects began to become full top-level Apache projects. This process has conti
jakarta.apache.org
위 링크에서 파일 업로드 라이브러리를 다운로드한다.
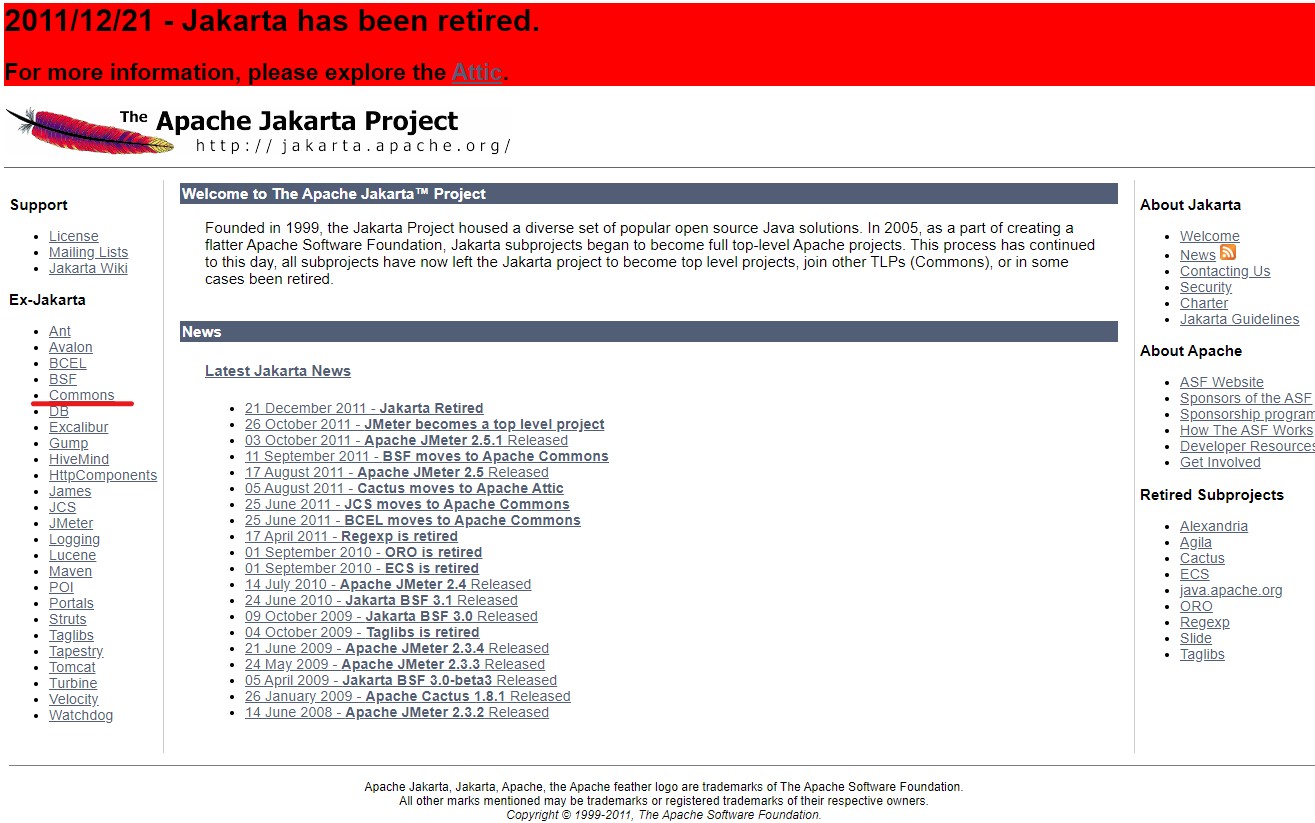
좌측 메뉴에서 Commons를 클릭
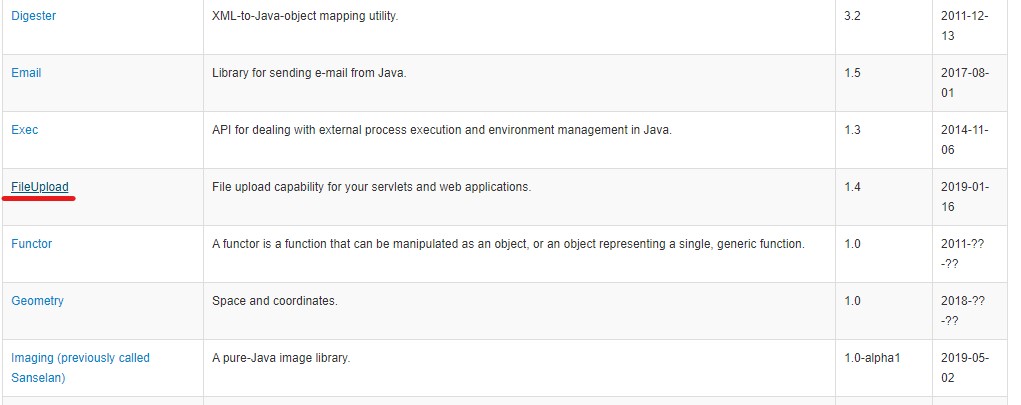
중간 부분에 있는 FileUpload를 클릭해서 원하는 버전을 다운로드한다.
그리고 아래 링크의 IO 라이브러리도 다운로드한다.
http://commons.apache.org/proper/commons-io/download_io.cgi
Commons IO – Download Apache Commons IO
Download Apache Commons IO Using a Mirror We recommend you use a mirror to download our release builds, but you must verify the integrity of the downloaded files using signatures downloaded from our main distribution directories. Recent releases (48 hours)
commons.apache.org
귀찮으면 필자가 올려놓은 파일을 다운로드하면 된다.
파일을 다운로드하였다면 압축을 풀고 안에 있는 commons-fileupload-1.4.jar와 commons-io-2.6.jar 라이브러리를 프로젝트에 추가해준다.

Dynamic Web Project라면 WEB-INF안에 lib폴더에 라이브러리를 복사&붙여 넣기 해준다.
그 후 파일을 업로드할 때 사용할 저장소 폴더를 만든다.
필자는 C 드라이브 아래 file_repo로 만들었다.
아래 표는 파일 업로드 관련 API에서 제공해주는 메서드들이다.
※참고: 자바 웹을 다루는 기술
DiskFileItemFactory 클래스 메서드
| 메서드 | 기능 |
| setRepository ( ) | 파일을 저장할 디렉터리를 설정 |
| setSizeThreadhold ( ) | 최대 업로드 가능한 파일 크기를 설정 |
ServletFileUpload 클래스 메서드
| 메서드 | 기능 |
| parseRequest ( ) | 전송된 매개변수를 List 객체로 얻음 |
| getItemIterator ( ) | 전송된 매개변수를 Iterator 타입으로 얻음 |
<%@ page language="java" contentType="text/html; charset=UTF-8"
pageEncoding="UTF-8" isELIgnored="false"%>
<%@ taglib prefix="c" uri="http://java.sun.com/jsp/jstl/core" %>
<c:set var="contextPath" value="${pageContext.request.contextPath}" />
<!DOCTYPE html>
<html>
<head>
<meta charset="UTF-8">
<title>Insert title here</title>
</head>
<body>
<form action="${contextPath}/upload.do" method="post" enctype="multipart/form-data">
파일1 : <input type="file" name="file1"><br>
파일2 : <input type="file" name="file2"><br>
매개변수1 : <input type="text" name="param1"><br>
매개변수2 : <input type="text" name="param2"><br>
매개변수3 : <input type="text" name="param3"><br>
<input type="submit" value="업로드">
</form>
</body>
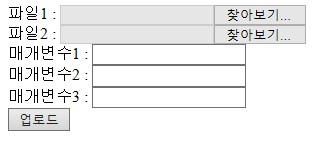
</html>파일 업로드를 할 JSP를 작성한다.
파일 업로드 시 form태그의 enctype을 반드시 multipart/form-data로 해주어야 한다.
업로드 버튼을 누르면 콘텍스트 이름/upload.do로 요청을 한다.
이제 파일 업로드 로직을 처리할 서블릿을 작성한다.
JSP의 요청을 받기 위해 /upload.do로 매핑해준다.
private void doHandle(HttpServletRequest request, HttpServletResponse response) throws ServletException, IOException {
	request.setCharacterEncoding("utf-8");
	String encoding = "UTF-8";
	File currentDirPath = new File("C:\\file_repo");
	DiskFileItemFactory factory = new DiskFileItemFactory();
	factory.setRepository(currentDirPath);
	factory.setSizeThreshold(1024*1024);
	ServletFileUpload upload = new ServletFileUpload(factory);
	try {
		List items = upload.parseRequest(request);
		for(int i = 0; i < items.size(); i++) {
			FileItem fileItem = (FileItem) items.get(i);
			if(fileItem.isFormField()) {
				System.out.println(fileItem.getFieldName() + " = " + fileItem.getString(encoding));
			} else {
				System.out.println("매개변수 : " + fileItem.getFieldName());
				System.out.println("파일이름 : " + fileItem.getName());
				System.out.println("파일크기 : " + fileItem.getSize() + "bytes");
				if(fileItem.getSize() > 0) {
					int idx = fileItem.getName().lastIndexOf("\\");
					if(idx == -1) {
						idx = fileItem.getName().lastIndexOf("/");
					}
					String fileName = fileItem.getName().substring(idx+1);
					File uploadFile = new File(currentDirPath + "\\" + fileName);
					fileItem.write(uploadFile);
				} //end if
			} //end if
		} //end for
	} catch (Exception e) {
		e.printStackTrace();
	}
}
위의 설명한 클래스들의 메서드를 이용하여 저장될 경로와 파일의 최대 사이즈를 설정하고 파일의 이름을 얻어와서 업로드를 한다.

위 사진을 JSP페이지에서 업로드를 하면 아래와 같은 결과가 된다.
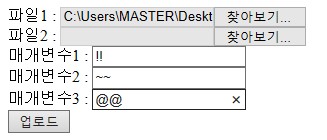
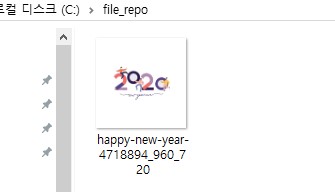
처음 만들어 두었던 file_repo 폴더에 잘 업로드된 모습을 확인할 수 있다.
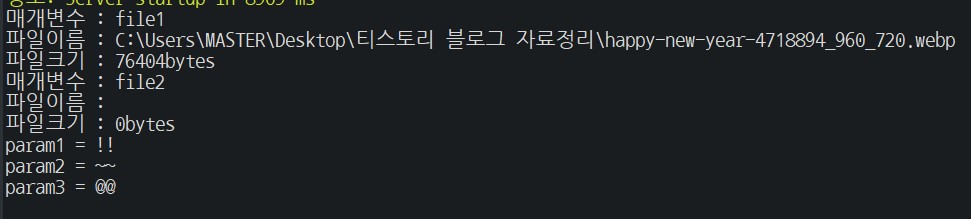
콘솔 로그에는 파일의 정보와 매개변수로 넘겨준 값들이 출력되는 모습을 확인할 수 있다.
본 포스팅은 필자가 공부한 것을 정리해놓은 것으로 오류가 존재할 수 있습니다.
코드 출처: 자바 웹을 다루는 기술